

Introduction: Custom Car Badges


I love camping. Not just camping, but the road trip to get there and even packing the car. I know, I'm a dork. My friends and I usually caravan in a few cars to get to our camping site, and having a custom camping car badge will make me the envy of my fellow outdoor-lovers. I'll show you how to make this design, but really there's no limit to the type of car badge you can make. In fact, the more specialized the better!
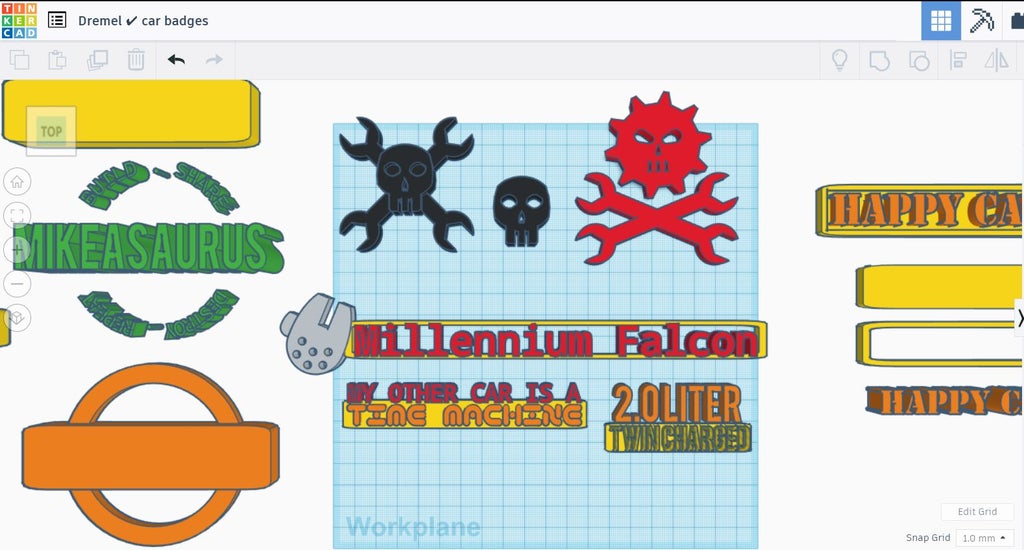
I made a few types of badges for my ride, trying out a few techniques. All designs were made using the free browser-based design program Tinkercad.
DISCLOSURE
Dremel was kind enough to loan me a laser to try out and see what projects I could come up with using Tinkercad. You can find out more about Dremel's new laser cutter and get a hefty discount here (discount ends September 30, 2018).
You can explore my design below, in the ebedded Tinkercad interface
You're welcome to use any of these designs, or modify them to make your own.
Ready to see how I'm now the coolest camper around? Let's make!
Step 1: Basic Shapes
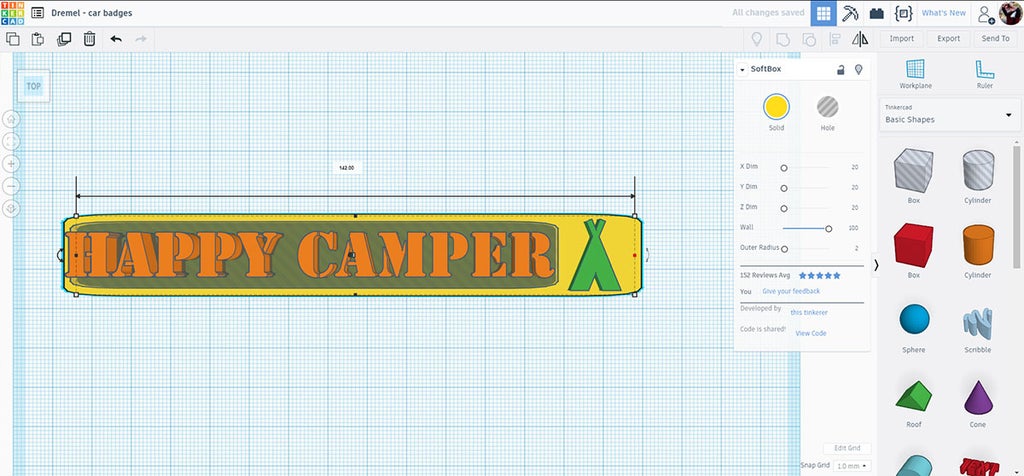
Start a new design in Tinkercad. The base of this badge is made from a shape called softbox, found under the Shape Generator library on the right side of the screen.

I like this shape as it has nice rounded edges while keeping the top and bottom flat. These shapes will be exported as SVG files for laser cutting, so only the portion of the shape that is touching the workplane will be exported.
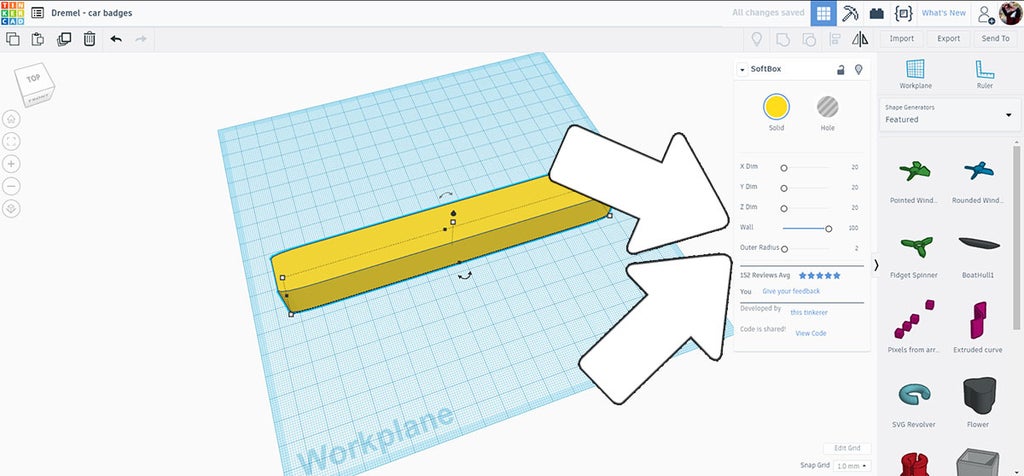
To fill in the center of the softbox the shape is selected and then the sliders in the pop up window are moved to create a solid wall. The outer radius can be changed to change the profile of the corner radius.
The shape was stretched using the handles on the corners to create a long rectangle, this will be the basic shape of this badge.
Step 2: Cut Outs
Duplicate the basic shape created and make the copy a hole, this will be the shape we use to make an opening in the base shape.
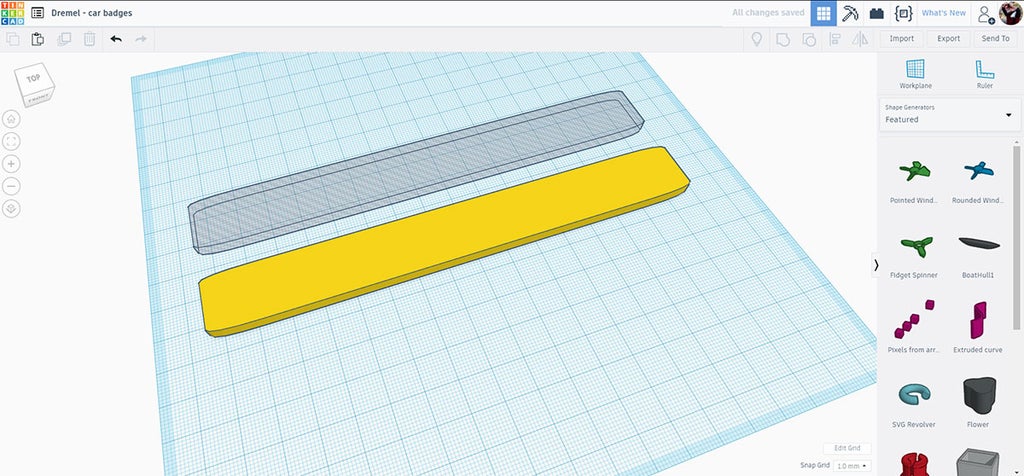
The hole shape was sized to be smaller than the original, then the align tool was used to put the hole into the middle of the original shape.
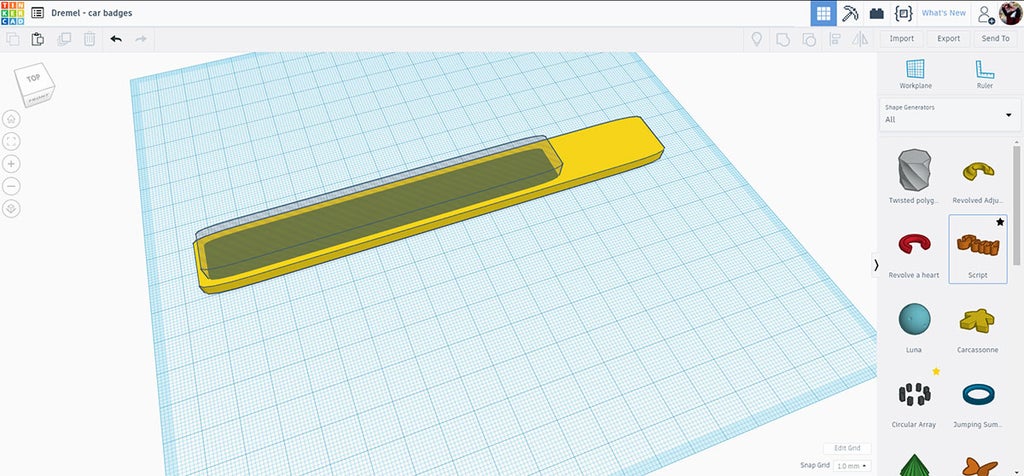
Step 3: Text
Tinkercad has a text shape in teh basic library, but there's a new text shape in the Shape Generator library that has multiple fonts you can choose from. The default text as it appears in the library is script.
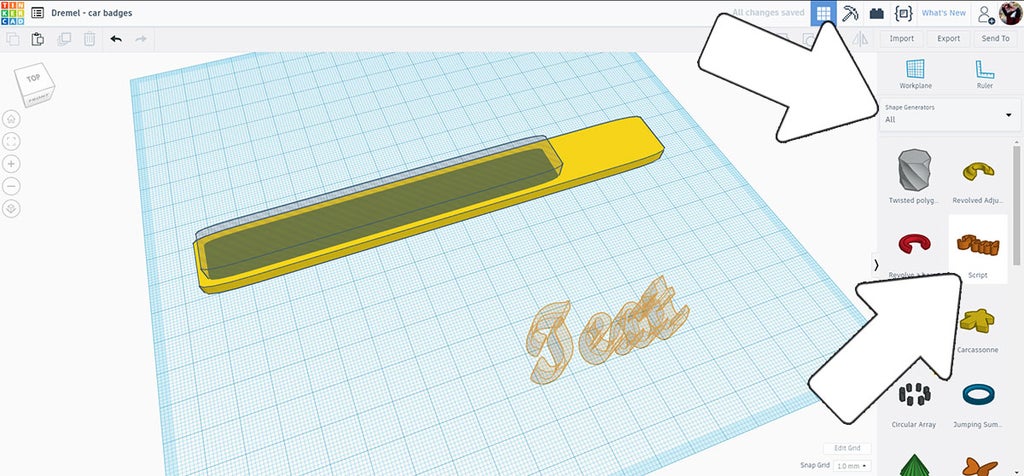
Drag the text shape onto the workplane. When selected, the text shape will have a dropdown where you can select which font you like.
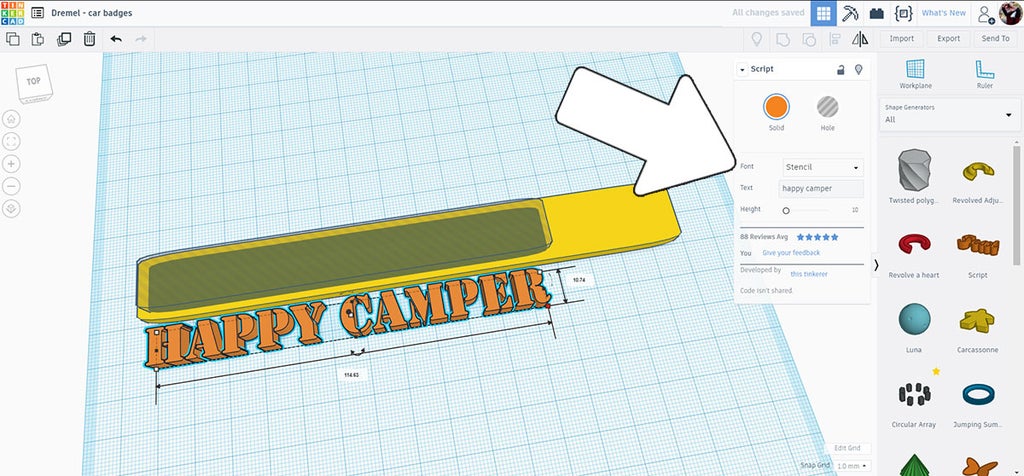
As you select a new font the text displayed will take a moment to render (be patient). Once you're happy with the font the text shape can be resized to fit into the hole opening. While dragging a corner of the text block to resize, you can hold the shift key to constrain the proportions which will keep the text from getting squished while sizing.
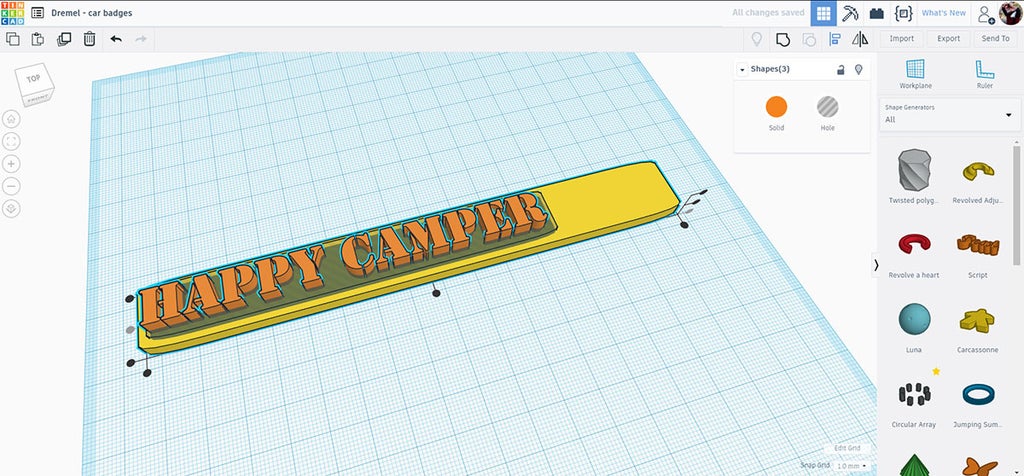
I kept the text taller than the rest of the elements so it's easier to see. With all 3 shapes selected I used the align tool from the top toolbar to keep them aligned.
Step 4: Embellishment
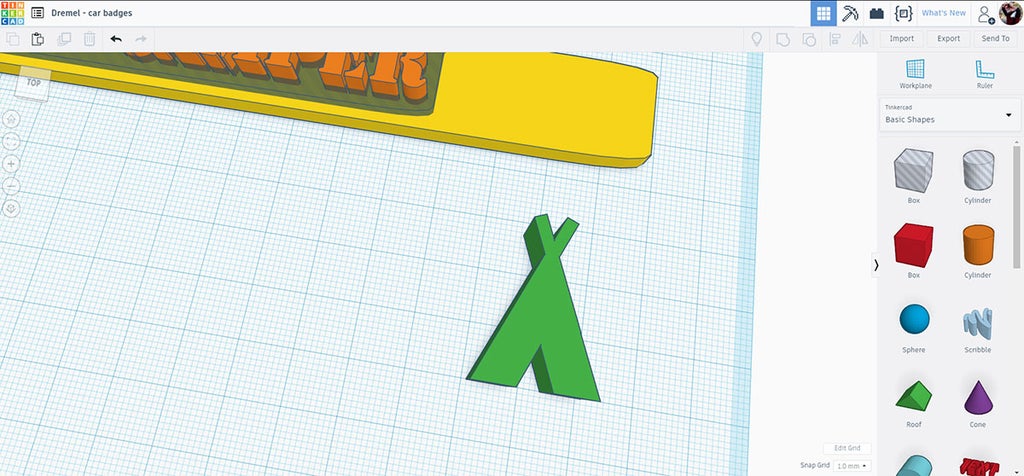
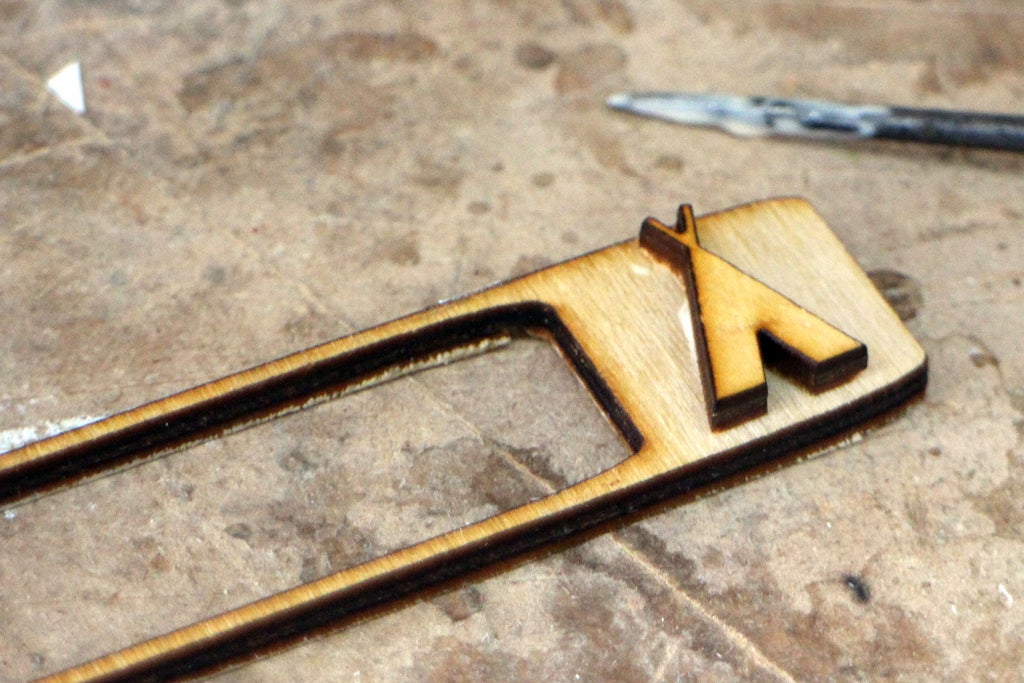
Text and a border is fine for a car badge, but adding a little embellishment will make this design really pop. Since this is a camping badge I went for something camping themed: a tent!

In the basic shapes library there's a roof shape that's perfect for a general tent shape. ❤
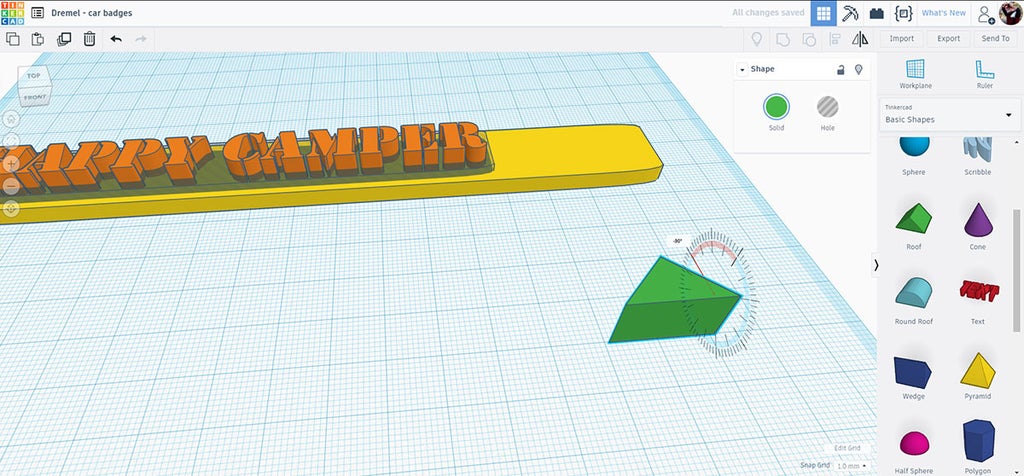
The roof shape can be selected and rotated using the arrows that appear.
 |  |
To really sell the tent shape I added two poles on either side in the form of squished rectangle shapes.
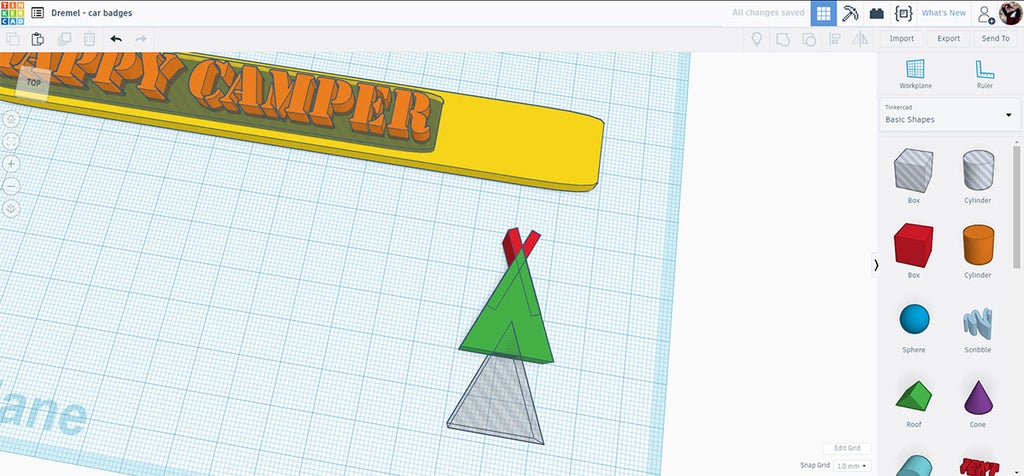
When I had the basic shape of the tent I made a duplicate (ctrl+D) of the roof shape, turned the duplicate into a hole and then moved it under the tent shape. This hole will be the tent opening when the shapes are grouped.
Step 5: Putting It All Together
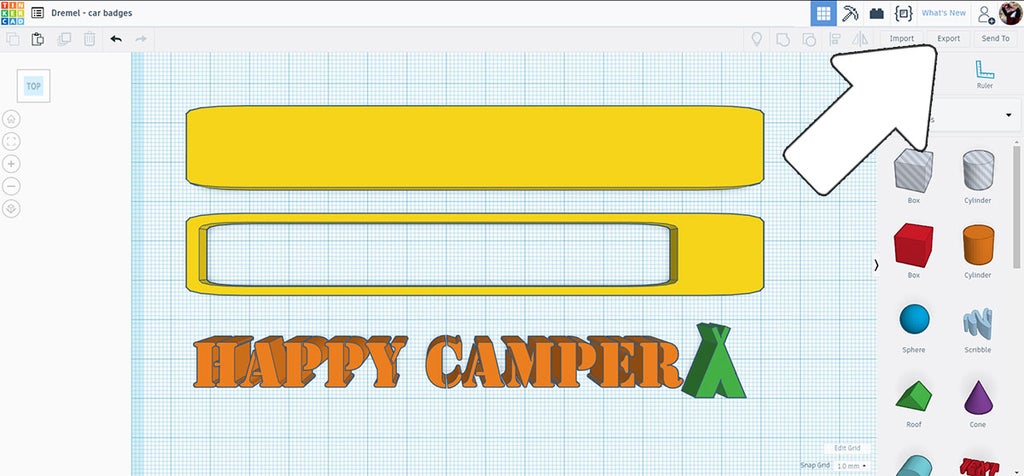
Once all the elements are lined up and sized correctly they can be separated into individual elements for laser cutting. Tinkercad will create SVG files from any shape that is touching the workplane.
For this badge to look the way I want there needs to be a few elements that need to be cut out:
- Backing to hold all the pieces and stick to the car
- Border
- Lettering and tent
Duplicate layers were made and grouped together to make the shapes I needed, then exported using the top toolbar and individually saved as SVGs for laser cutting.
Here's a few other designs I made while I was in Tinkercad. You can access these designs here.
Step 6: Laser Time!

Each SVG was brought into the browser based Dremel laser interface. This laser cutter is not only great for cutting but also etching. By etching in the lettering and tent onto the wood first it gives a reference on placement after the pieces are cut out.
The text was placed first and then selected, opening up an option window that accesses the cut settings for the laser. I changed the laser from cut to etch which will do a light pass over the wood and not cut all the way through.
After sending that job to the cutter the rest of the files can be selected and changed to cut, then sent to the laser to complete the job.
Step 7: Assembly

While the parts were still inside the laser cutter I placed a strip of masking tape over the lettering to keep them all together and aligned as I pulled them out. This tape also allowed easier placement of the letters onto the etched space on the backing piece.

The layers were glued together with regular wood glue, checking for alignment before clamping together until the glue dried.
The scorch marks from the laser cutting won't need to be sanded since the entire piece will be painted.
Step 8: (Alternate Design)

Making custom badges for my ride was so much fun I tried to push the boundaries of what I could make on the Dremel laser, so I made a detailed badge with lots of little pieces to see how the machine handles the geometry. The pictures in this step show the results.
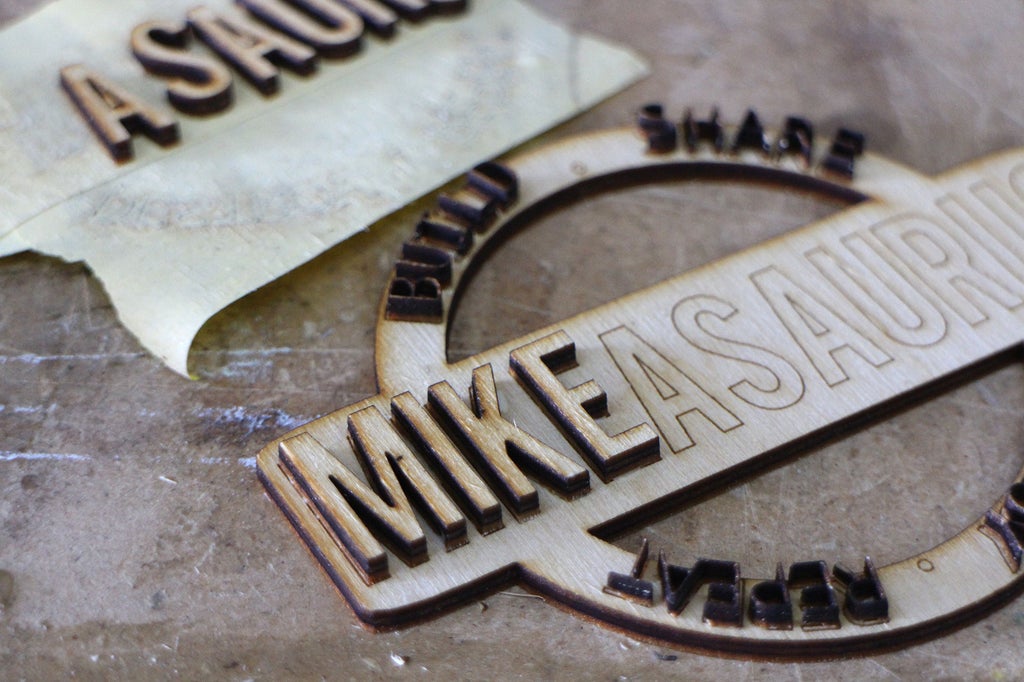
I created this badge in Tinkercad. The shapes were separated and cut out as individual SVG files, using the etch process in the Dremel laser interface to score where the letters should be placed after cutting.
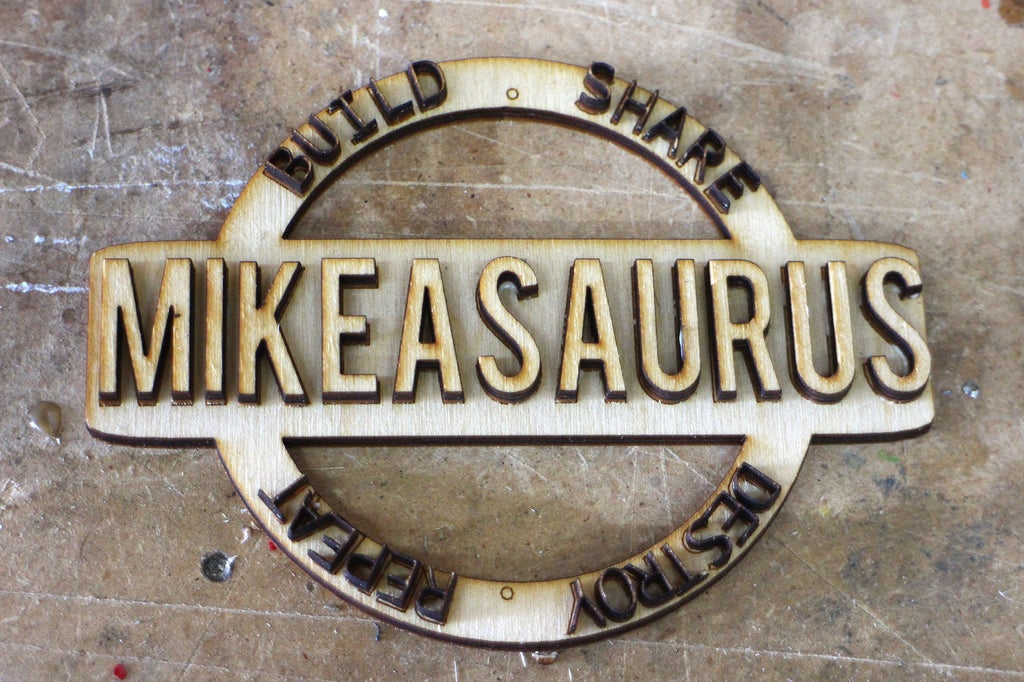
The etching made the letter placement really easy. Regular wood glue was used to keep everything together.
Step 9: Prime

To make sure the metallic paint I wanted to use had a good base I used a flat black primer on the cut pieces. Two coats of primer, with about 30 minutes in between coats.
Step 10: Metallic Paint

Metallic spray paint can be found in any hardware store in the spray paint aisle alongside regular spray paint. The trick when applying metallic spray paint is to do multiple light passes to build up the metallic effect.
Light spray passes were applied to the badges, I used about 5 passes to make these badges really pop.
Step 11: Background + Sealing

To add definition black acrylic paint was used to fill in space and highlight some elements of the badges.
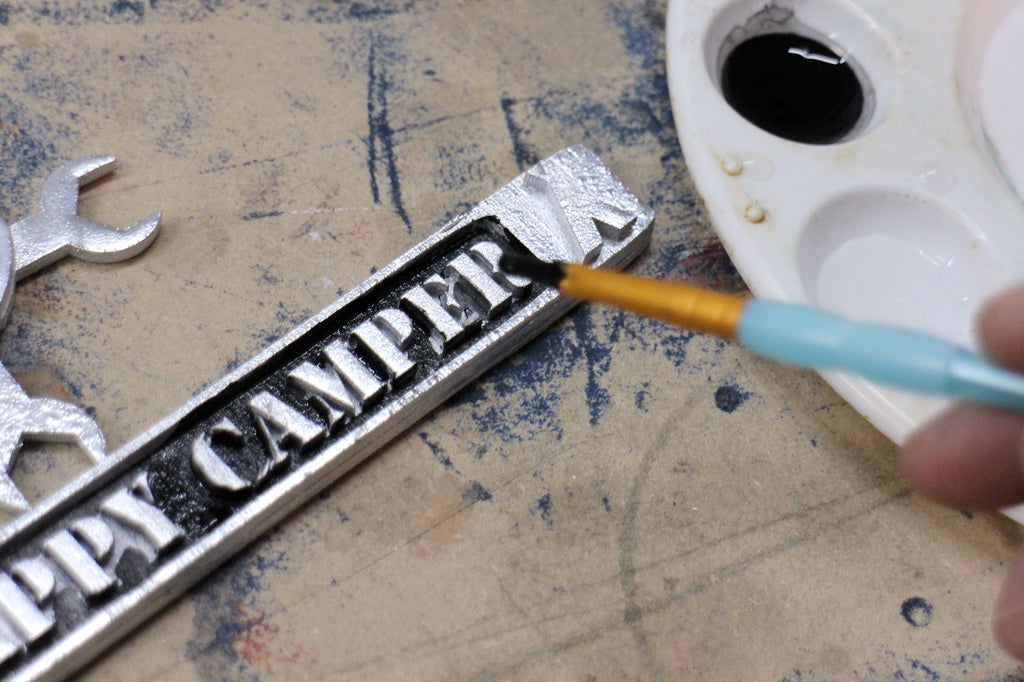
Once the metallic paint is dried it is glossy, which makes any mistakes of the black paint easy to clean up with a cloth if you're quick.
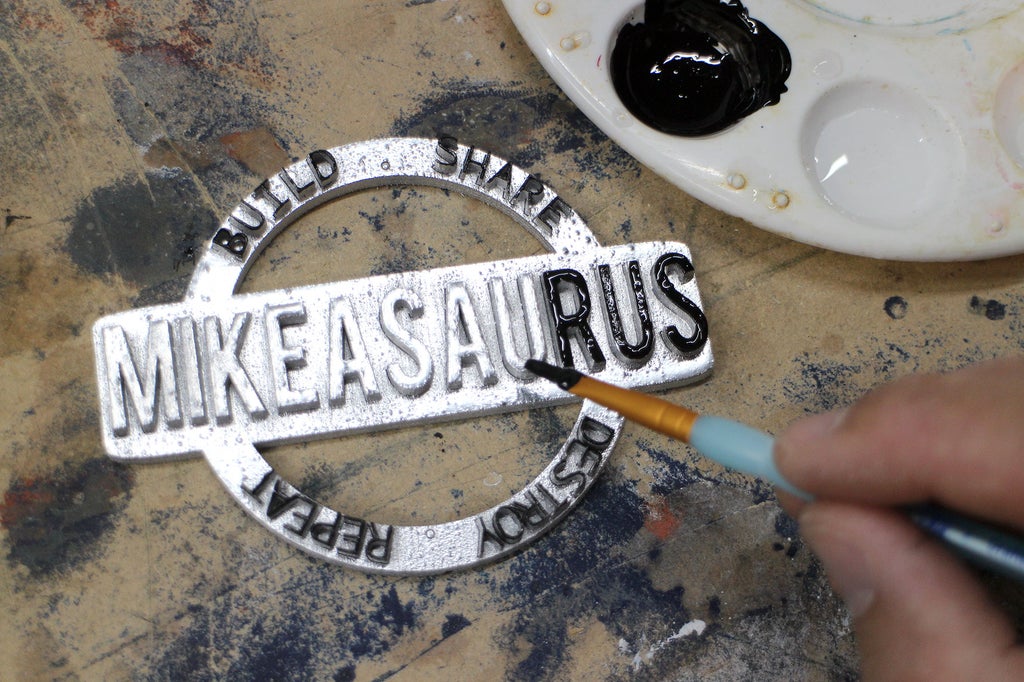
Here's another badge design where I decided to paint in the lettering instead of the negative space. Both techniques worked really well.
After all paint has dried I applied 3 coats of exterior grade polyurethane to seal the badges and make them weatherproof.
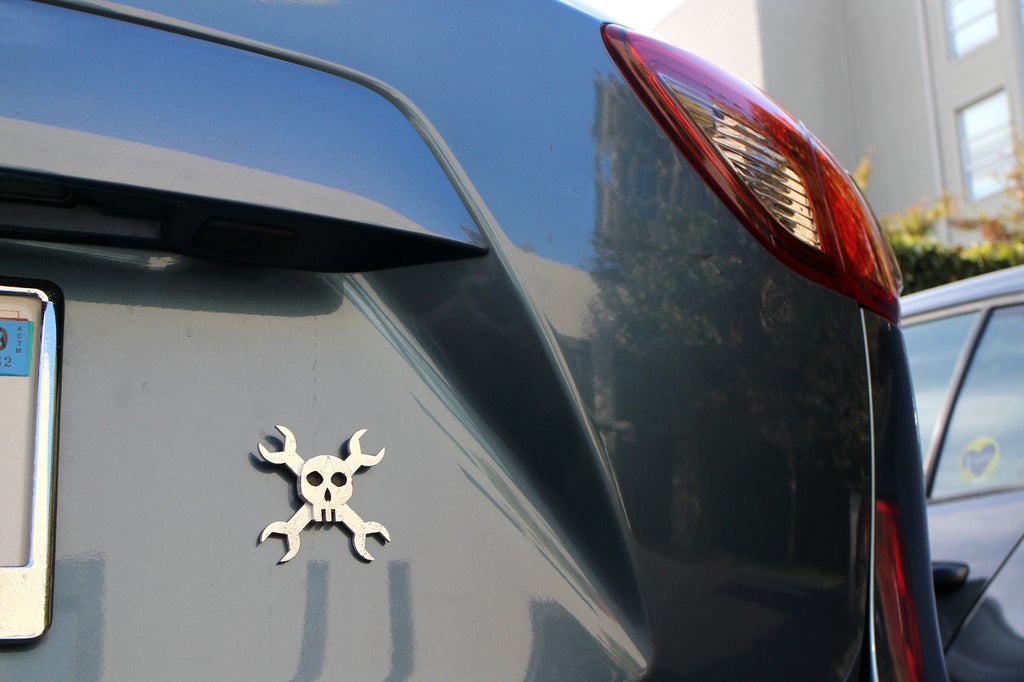
Step 12: Stick Those Badges

These custom badges can be applied anywhere on your vehicle. I stuck mine to my car using automotive nameplate tape, which is a non-permanent heavy duty bond but can be removed if desired.
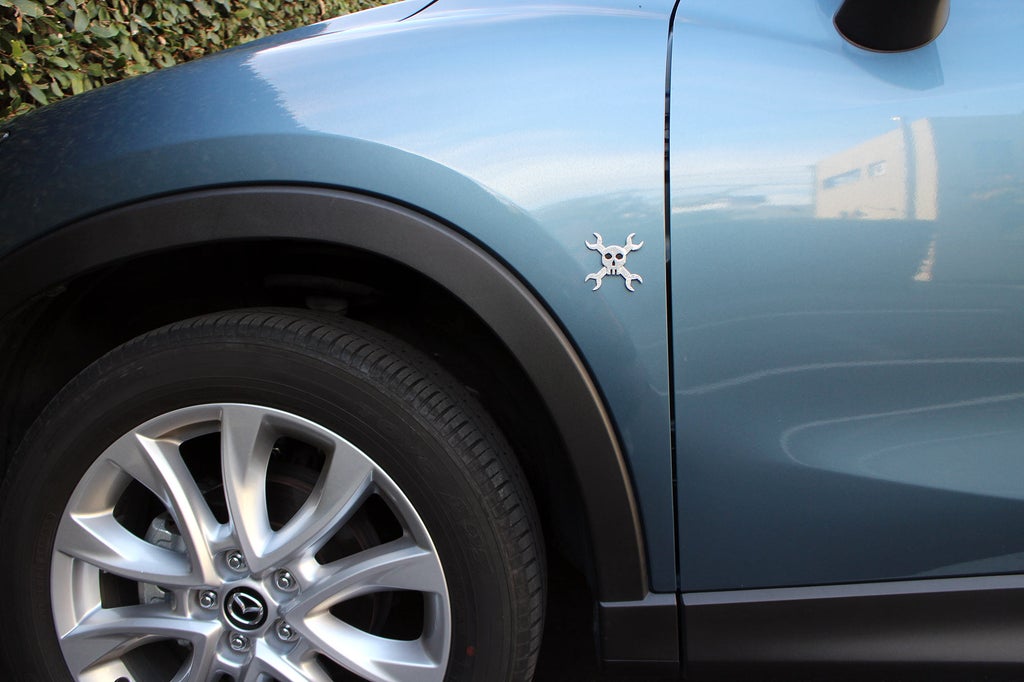
I made a few badges that I put in select locations on my ride, letting everyone know how I roll.
If you've made your own car badges, with or without a laser cutter, I want to see them! Add a picture of your creation in the comments below.
Happy making :)


